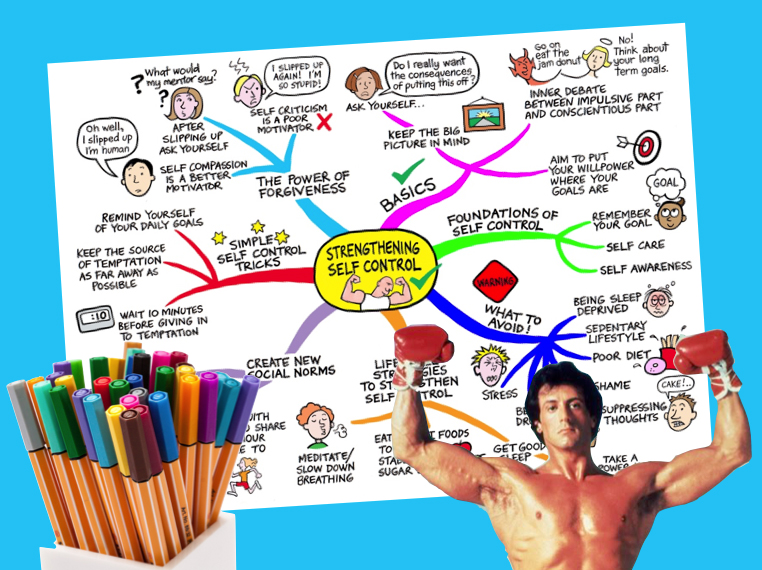
The funny drawings, the colour, and creativity can transform any dry subject into something that’s interesting for the brain.
But mind mapping is also a great life strategy. You can use it to create plans, capture ideas from books, set goals, clarify your thinking, organise your finances, and work your way out of messy situations.
Below I explore some different ways you can use mind maps in your day-to-day life.

Do you ever read books and then feel frustrated when you can’t remember much from them?
This is why I mind map out every non-fiction book that I read.
I know that there are limits to my memory. If I want to be able to extract ideas and strategies from a book and apply them to my life, I’m going to need to create mind maps.
There are two ways you can mind map a book:
1) You can mind map as you read: this forces you to slow down and really think about the ideas. I highly recommended doing this if the content is really complex. But this approach can be slow going!
2) You can mind map once you’ve finished reading: I use mini post-it notes to tab key ideas as I read. Once I’ve finished reading the book, I go back and mind map out the tabbed ideas. This way I have some perspective and can identify what’s important and what’s not (rather than assuming every sentence is important and needs to be mind mapped).
After I’ve finished mind mapping the book, I select a strategy that I’ve captured on the mind map to test out.
My husband has always been amazed at how I can take ideas from books and apply them to my life. But there’s no magic to this. I’m able to use lots of different strategies because mind mapping helps me to understand and remember them.
Let’s face it, if you can’t remember a strategy, you can’t use it!
Let’s say you have a test or exam coming up. Here’s how you can use mind maps to effectively prepare . . .
Push your notes and books to the side (you can’t look at them). Now grab a blank sheet of paper. Set a timer for 5 minutes and try to create a mind map on the main ideas you can remember.
Don’t try to make these mind maps look pretty. You’ve only got 5 minutes, so scribble and draw out as much as you can remember.
Once you’ve exhausted your memory, pull out your notes and pick a different coloured pen. Take a look at your messy mind map: What did you get right? What did you get wrong? Where are the gaps in your knowledge?
This strategy is called Active Recall and it’s the most effective way to retain information. You can read more about it here.
When you feel overwhelmed by life, everything can feel urgent and important. But not everything is urgent and important. A little prioritisation can save you a lot of stress and drama.
Grab a big sheet of paper, draw a circle in the middle, and write inside it Stuff to do. Now get everything out of your head and on to the page!
Once you’ve finished your mind map, look over all the tasks.
If a task is important, give it a tick.
If a task is urgent, circle it.
Focus your energy on knocking off the tasks that have ticks and circles around them (they are urgent and important).
Research shows the more connected you are to your Future Self, the more committed you will be to achieving your goals and the wiser decisions you will make in the present.
Draw a circle in the middle of page and write inside it My Future Self. You can create branches for your Future Self in:
• 3 months’ time
• 6 months’ time
• 1 year’s time
• 3 years’ time
• 5 years’ time
Then off each of these main branches, write down your goals. What do you want to have accomplished by this time?
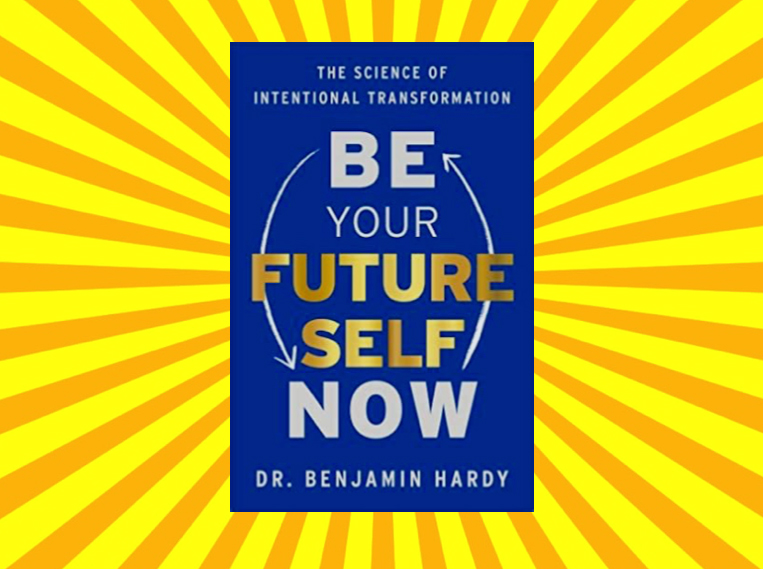
As Dr Benjamin Hardy states in his book Be Your Future Self Now:
“The clearer you are on where you want to go, the less distracted you’ll be by endless options.”
Note: Imagining your Future Self is not an easy thing to do. We are terrible at imagining where we are going to be in the future. So, don’t overthink it. Just get some ideas down on paper. As you gain more clarity around your goals and values, you can always add extra branches to your mind map.
I’ve found mind mapping to be a fun and effective way to capture, organise, and retain information. Even if I never look at the mind map again, the process of getting ideas down on paper makes a big difference. It helps me to feel more in control and on top of things.
If you need some clarity in a particular area, stop ruminating. Pick up a pen and start mind mapping!
Share This:

When you start using this strategy, it can feel clunky and awkward. It requires some mental effort to get going.
Why can it feel hard to start mind mapping?
Because it isn’t a habit (not yet, anyway). But once mind mapping becomes a habit, it can feel easy and deeply rewarding.
So, how do you get to that point where mind mapping feels easy? Even fun?
In this article, I will explore how you can create a habit of mind mapping. I’ll show you how to remove friction or pain points so it’s much easier to put pen to paper and absorb ideas.
Let’s start by looking at what gets in the way and stops many people from creating mind maps in the first place. I’ll also share some strategies you can use to overcome each of these barriers.
When you look at a mind map with all the pictures and different colours, it seems like something that would take a fair amount of time and effort to create.
If you’re comparing mind mapping to the time it takes to read your book passively, then yes, mind mapping will take more time. But you need to understand that reading your book passively is not an effective way to learn. In contrast, mind mapping is super effective.
People often fall into the trap of trying to make their mind maps look like works of art. Try lowering your standards and allowing yourself to make a mess when you mind map. This will speed up the process.
Another time trap is trying to mind map as you read and trying to mind map everything you read. I find it’s much faster to read and tab key ideas worth mind mapping later on. Once I’ve finished reading either the chapter or book, I then commence the mind mapping process. By this stage, I have a better understanding of the key ideas and what’s worth mind mapping.
Some people get hung up on the way their mind maps look. They can’t stand looking at messy pictures and scribbled words. If that’s you, perhaps you could take your drawing skills to the next level with some practice and sketch classes. But it’s not necessary.
Mind maps are not there to look pretty. They are there to help you learn. I am a big fan of badly drawn mind maps. If you look at my mind maps from university, they’re not works of art but they contain loads of important ideas. And that’s what matters most when it comes to learning.
Here’s a simple hack: invest in a set of nice, vibrant coloured pens. A bit of colour on the page will make your mind maps more visually appealing.
Mind mapping is straightforward. You draw a central image, curved lines, a few pictures, and write down key ideas. That’s it!
It’s not something you need to read a book about. You don’t need to enrol in a 10 week program to learn how to do this.
If you want some tips on how to mind map, check out my free Mind Mapper’s Toolkit. It’s a quick and easy read.
It’s important to realise that the first time you engage in any new behaviour, it will most likely feel strange and uncomfortable. You may feel a bit clumsy and awkward. You may have questions, “Am I doing this right?”. All of this is normal and to be expected.
Even something as simple as the pen you mind map with can make or break the mind mapping process.
You’ve probably noticed that some pens don’t feel pleasant to write or draw with. For instance, I’m not a fan of the popular Sharpie pen range. I don’t like the way these pens bleed through the page. And I really don’t like the way they smell.
These may seem like minor irritations and quirks, but trust me, they’re not. Your mind mapping experience will be diminished by a pen that doesn’t feel good in your hand or on the page. And any behaviour that feels unpleasant is much harder to sustain.
I’ve since ditched my Sharpie pens. I mind map with a uniball signo pen and non-toxic Tombow paintbrush pens. As far as coloured pens go, I won’t lie, these pens are pricey! But you can find them online for $25 cheaper than in Officeworks (a big stationery store in Australia).
What I love about these pens is that they are super easy to use, feel lovely to strike across the page, and they won’t leave you with a splitting headache from the ink smell.
Here are some things that have helped me to establish this habit in my life:
When is the best time for you to mind map? Where in your day can you easily slot in a 15 minute mind mapping session?
I like to mind map when I feel fresh and mentally alert (first thing in the morning).
Find an activity that you do every day without fail (e.g., having a shower, eating breakfast or dinner) and use that to prompt you to start a mind mapping session.
For instance, after I have completed my morning routine (workout, breakfast and shower), that’s my cue to sit down and start mind mapping.
Before you start your session, set yourself up with everything you need to mind map. I like doing this the night before my morning mind mapping sessions.
Before I go to bed, I lay out a sheet of A3 paper, my pens, and my timer. The book I am mind mapping is open on the page where I need to start working. The next day, all I need to do is sit down, start my timer, pick up a pen, and away I go!

What’s one thing that can slow down the mind mapping process?
For me, it’s digital distractions (e.g., text messages and notifications).
You probably already know the things that tend to derail you. Create a barrier between you and those things.
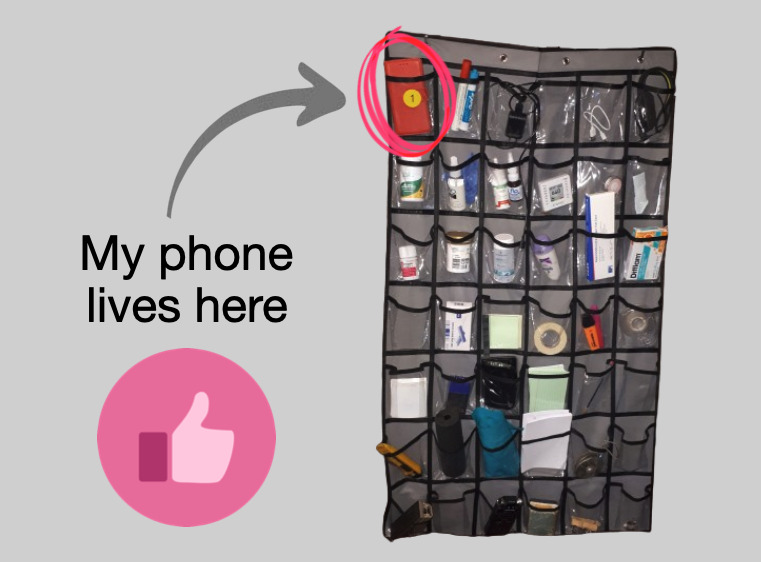
For example, my phone is the biggest distraction for me. How do I deal with this? Before I start mind mapping, I take my phone and place it away from my body in another room.
This signals to my brain that my phone is off-limits and it’s time to knuckle down and focus on my work.
Don’t wait until you feel pumped and inspired to create a mind map. Set a timer for 10-15 minutes and start mind mapping (regardless of how you feel).
If you miss a day, don’t beat yourself up. It’s no big deal. Just say to yourself, “Tomorrow is a new day. I will get back into mind mapping then”.
When the timer goes off at the end of your mind mapping session, say to yourself, “Good job!”. Do anything that makes you feel instantly good. I often clap my hands or do a fist pump.
According to Professor BJ Fogg, the secret to wiring in any new habit is to release a positive emotion within milliseconds of engaging in the new behaviour. When you release positive emotions, this releases dopamine in your brain. This makes it more likely that you’ll engage in this behaviour again.
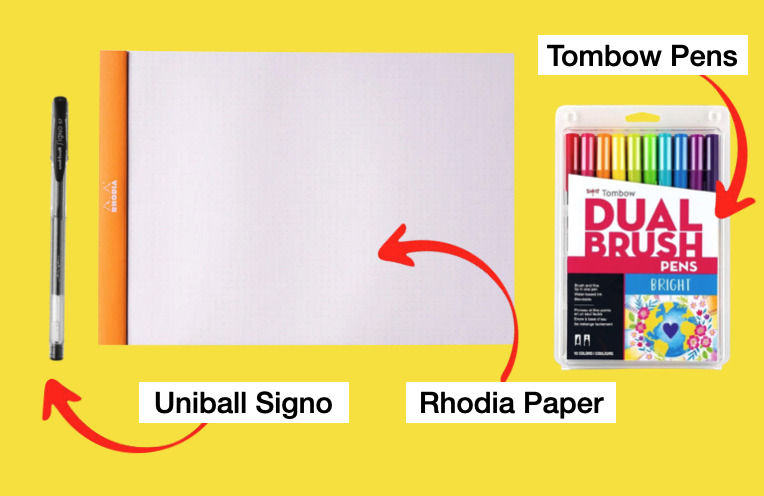
I mentioned this before, but it’s important to repeat it: don’t go cheap with your mind mapping tools. Invest in good pens and paper. My favourite pens for mind mapping are uniball signo pens (0.7 tip) and Tombow paintbrush pens. Regarding paper, I love using Rhodia paper (it feels like your mind mapping on butter).
It may sound a little dramatic, but mind mapping changed my life. I used to read books and then feel frustrated that I couldn’t retain much information. But now, I have a strategy I can easily use to help me understand and remember complex ideas. This gives me confidence when it comes to learning new skills and information.
I encourage you to be playful with this strategy. Don’t get too hung up on how your drawings look. Your top priority is to leave perfectionism at the door and have some fun. Because when it comes to mind mapping, done is better than perfect.
You need to practice. And practice in a particular way.
If you’re preparing for a driving test, you can’t just study the Drive Safe Handbook (i.e., the theory and road rules).
You need to get behind the wheel of a car and drive.
Yes, it can feel uncomfortable and scary to begin with. But you’ll only improve your driving skills by pushing through the discomfort, placing your hands on the wheel and your foot on the accelerator.
If a person spent all their time only studying the road rules and never getting behind the wheel of a car, how would they go in the driving test?
It would be disastrous!
Yet, many students are approaching exams in a similar way.
These students are doing the equivalent of only studying the road rules handbook before the exam.
Here’s how they prepare for academic exams:
• By creating beautiful sets of notes
• By rereading their books and notes
• By highlighting their books and notes
• By rewriting their notes
• By summarising their notes
These are not effective ways to prepare for an exam.
Do these ways of revising feel nice and easy?
Yes. They certainly do.
But are they effective ways to remember information?
No.
Think about it like this . . .
What do you need to do in most academic tests and exams?
You have to read questions and pull the information out of your brain. Most of the time, you can’t look at your notes and books.
It’s just you and your brain.
You’re not being assessed on your ability to summarise information, your ability to reread your notes, or highlight information. So, why would you prepare for an exam in that way?
The best way to prepare for an exam is by practising remembering information. This is how you become masterful at answering questions with accuracy, speed, and confidence.
You don’t get that speed, confidence, and deep understanding by rereading your books and notes.
If you reread as an exam revision strategy, the only confidence you develop is fool’s confidence. You delude yourself into thinking you know it (“I’m ready!”). After reading your notes a few times, the ideas feel familiar to you (“I know this stuff”).
But trust me, you’ll struggle to retrieve the information in the exam.
Imagine yourself driving through red lights and failing to take the handbrake off before you leave the parking lot: that’s you . . . and it’s a fail.
I know this may sound harsh. But I’m speaking from personal experience.
In high school, it felt good to highlight my notes and reread them leading up to an exam. However, when it came crunch time, I was stressed out in the exam because I couldn’t retrieve the information. I felt embarrassed and confused by my results.
“But I studied so hard!” I’d cry. Why didn’t all those of hours of reading translate to better grades?
I wish someone had gently explained to me, “Yes, you did study hard. But you didn’t study effectively”.
Fast forward 20 years and I’ve learnt how to study smarter (not harder).
“The best way to prepare for any test or exam is to use a learning technique called active recall.
Active recall involves testing yourself.
You push your notes and books to the side and try to bring to mind as much as you can about a topic you’ve already covered in class. For example, you can use a piece of paper to write or draw out what you can remember on the topic. Once you’ve exhausted your memory, you check your books and notes to see how you went.
Yes, this is challenging. But it delivers results.”
I use this technique to learn content for all my school presentations.
When I speak to a group of students, parents, or teachers, it may look like I’m casually explaining strategies, but all my presentations are carefully planned and practised.
If I didn’t do this critical prep work, I would end up rambling.
This is why two weeks ago, I started doing active recall to learn a new presentation —or at least, I thought I was doing active recall.
I pulled out a copy of my presentation slides that had my notes scribbled all over them.
Within the first five minutes, I had to stop and be honest with myself: I wasn’t doing active recall. I was reading my notes.
Many of us can fall into the trap of rereading when doing active recall.
As the Learning Scientists state in their book Ace That Test:
“When you try to bring information to mind from memory, it often feels really difficult. It can be really tempting to quit or try to look up all of the information in your notes or your textbook, but slipping into re-reading your notes or textbook will reduce learning. Instead, it is better to try to bring as much information to mind from your memory as you can, and only after you have tried this should you look in your notes, textbook, or other course materials to see what you got right and what you forgot or need to work on more.”
Reading your notes/books over and over again feels nice and easy. It doesn’t require a lot of strain and mental effort.
In contrast, active recall can make us feel clumsy and awkward, especially in the early stages of learning something new.
So, I asked myself the question:
How can I stop myself from rereading when I do active recall?
I brainstormed ideas and devised a plan. Then, I broke down the process and practised running through it several times. To my delight, it worked!
Whether you’re trying to learn a new presentation or preparing for an academic test or exam, here is a process you can follow to avoid the trap of rereading.
Clear away your notes, books, and any other distractions. Let’s face it: if your notes and phone are in front of you, it’s like having a packet of crisps or a bowl of lollies within arms’ reach. It’s too tempting.
Your notes are important (you need them for step 4), but for now, take them and place them away from your body in another room.
Active recall requires 100% of your brainpower. If your attention shifts from your study to your phone, the effectiveness of your active recall sessions decreases. This is why I highly recommend you put your phone away from your body in another room before you sit down to do active recall.
Once you’ve cleared away distractions, take out your practice exam paper or list of questions (in my case, a printout of my presentation slides) and get a pen, a timer, and some sticky notes.
Your goal for the next 10 minutes is to recall as much as possible. Exhaust your memory.
I scribble all over my slides (yes, it’s a messy process). If I run out of space on the page, I grab a sticky note, write the additional information on it, and then stick it down on the relevant slide.
During these 10 minutes, expect to experience some discomfort. In fact, welcome and celebrate the discomfort!
The discomfort is a sign that you are on the right track and deep learning is happening.
Active recall can be mentally exhausting. After doing 10 minutes, reward yourself by taking a quick break. I usually get up and move my body. Sometimes, I make myself a warm drink or smoothie.
Before returning to your workstation, grab your notes or the answer sheet from the other room.
It’s not enough to pull the information out of your brain. You have to see how you did (what you got right and wrong and where the gaps in your knowledge are).
So, how did you go?
At this point, enter teacher mode. Pretend to be a teacher giving yourself feedback.
I pull out my red gel pen, fun stamp and sticker collection, and highlighters.
Now is when it’s okay to look at your books and notes. Pull them out and begin marking up what you got right, wrong and anything important you missed.
In my case, if any presentation content is a bit rusty, I’ll highlight that section. The highlighter signals to my brain that this section needs extra practice.
It’s important to celebrate any content you recall correctly. Give yourself a tick, a fun stamp or sticker or draw a smiley face to congratulate yourself.
This is a process. It usually takes a few practice sessions to successfully retrieve the correct information. Encouraging yourself makes the process fun and gives you a feeling of success (“I’m making progress!”).
Once you finish step 4, make a note for your future self: what question or section will you work on for your next active recall session?
This reduces decision fatigue. When you next sit down to study this subject, there’s no need to waste precious mental energy thinking, “What should I revise next?” Your brain knows exactly what it needs to do, and you can begin doing active recall straightaway.
After you’ve decided on your starting point, prepare your workstation for your next active recall session (e.g., put your notes out of sight).
These six steps work for me. But feel free to modify this process so it works for you. For example, it can help to do active recall with others (e.g., in a study group with friends testing each other). When everyone experiences the discomfort together, the process becomes less painful and more enjoyable.
Active recall works, but paradoxically, it feels like it’s not working. Often, when I do active recall nothing comes to mind. That’s normal! Don’t use this as an excuse to abandon this highly effective strategy and return to rereading, which is an ineffective strategy.
My advice is to trust the process. You need to persevere with this strategy for long enough to see with your own eyes that it works. Don’t expect instant results. This process takes time, but the results are well worth it.
Research shows active recall (aka retrieval practice) is a highly effective strategy for remembering information. This strategy will take your studies and your grades to the next level.
Active recall involves bringing information to mind without looking at your books and notes.
I have spent the last 30 days experimenting with this excellent learning strategy. In this blog, I’ll share what I did and how I kept the process interesting for my brain.
I no longer need to study for tests and exams.
So, why did I spend 30 days using active recall strategies?
In my line of work, I need to constantly come up with new and original content to present to students. I also need to memorise this content. Why?
Because if I was to read from a sheet of notes or text heavy slides that would be really boring for students. I want to connect with students and to do this, I have to be able to deliver the content off the top of my head with speed and ease.
This is where active recall enters the picture.
Active recall helps to speed up the learning process. It allows you to learn more in less time.
Below I share some of the ways I use active recall to learn new presentation content. Keep in mind, you can use all of these strategies to prepare for an upcoming test or exam.
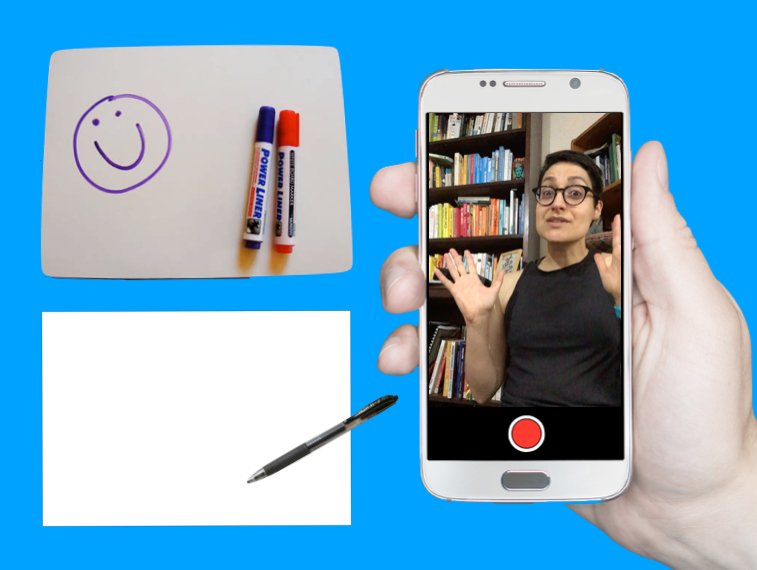
Whiteboards are wonderful learning tools. Here’s how I use a whiteboard to do active recall . . .
I push my speech notes to the side, so I can’t look at them. Then I grab a marker and say to myself, “What can you remember? Go!”.
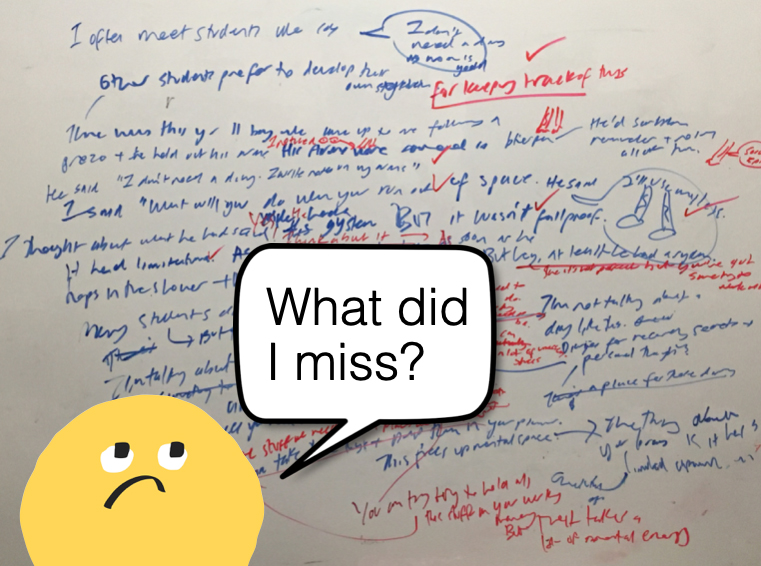
I write out everything I can remember on the whiteboard. Once I’ve exhausted my memory, I pick up my notes and check to see how I went (using a red marker to make corrections).
No whiteboard? No problem!
I pick up a pen and sheet of paper and start scribbling out whatever I can remember on the topic. When I get stuck, I pause and take a few deep breaths as I try to scan my brain for the information.
I regularly remind myself that it is okay to not remember the content. “This is how the process goes!”, I say to myself. There is no point beating myself up. That only leads to feelings of misery and not wanting to do active recall practice.
After having a shot at it, I take out my notes, pick up a red pen, and begin the process of checking to see how I went.
Sick of writing? I get it.
Try drawing out the information instead. Alternatively, you can use a combination of words and pictures, which is what I often do.
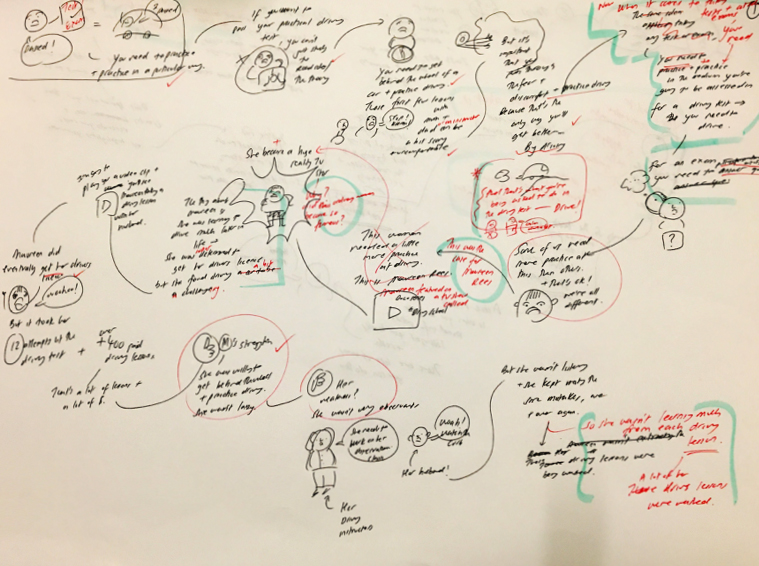
Grab a blank piece of paper (A3 size is best) and create a mind map of everything you can remember on a topic (no peeking at your notes). Then check your notes or the original mind map to see what you remembered correctly and incorrectly.
Writing and drawing out information can take time. If you want to speed up the process, you can talk to yourself.
But don’t do this in your head. It’s too easy to just say “Yeah, yeah, I know this stuff!”. You need to speak it out loud as this forces you to have a complete thought. Then, check your notes to see how you went.
The only downside with this approach is you don’t have a tangible record of what you recalled, which brings me to the next strategy . . .
I make videos of myself presenting the content (without referring to my notes). Although I use special software and tools to make my videos, you don’t need any fancy equipment. Your phone will do the job. Here’s what you can do . . .
Set your phone up so the camera is facing you. Now hit the record button and tell the camera what you’re going to do active recall on. Have a shot at explaining the idea. Then stop recording and hit the play button.
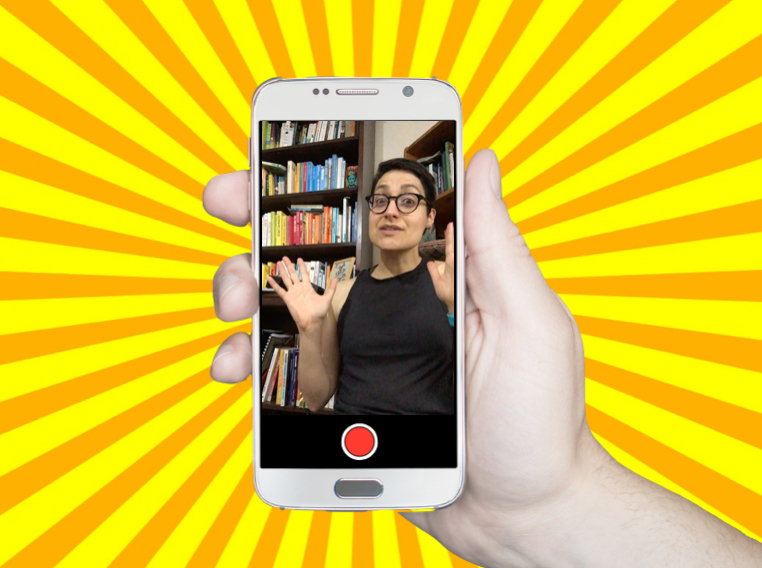
Watching yourself struggle to remember information is often hard viewing. But this is where it’s super important to double down on telling yourself kind thoughts (e.g., “I’m still learning this content. It’s going to be rusty and feel clunky – that’s okay!”).
You need to take a deep breath and keep watching because the video will give you valuable feedback.
For example, if you stop midsentence and you don’t know how to proceed, that tells you something: you don’t know this stuff so well! Make a note. This part of the content needs your attention.
Hand your notes over to a friend, parent, or sibling. Now get them to ask you questions on the content.
I sat with my mum and showed her a print out of my slides for a new presentation. The slides were just pictures (no text).
As I went through the slides, I explained the ideas to mum. I made notes of any sections I was rusty on. Mum also asked lots of questions, which allowed me to think more deeply about the content.
When it came crunch time (a few days before the final presentation), I printed out my presentation slides (16 per page) and used each slide as a prompt. I’d look at the slide and say, “What do I need to say here?”.

Sometimes I wrote out what I’d be saying in relation to each slide (without looking at my notes). Then I checked my original notes to make sure I hadn’t forgotten anything.
It’s really important that you don’t skip the stage of checking to see how you went, especially as you become more confident with the content.
At times, I found myself thinking “I know this stuff! I don’t need to check my notes” but then another part would say, “You better just check . . . just to be on the safe side”.
I’m glad I forced myself to check because more often than not I would discover that I had missed a crucial point.
Zines are cute little booklets you can create on any topic you like. They are fun to make, so I thought I’d try making a mini zine on the main points of some new content I had to learn.
I folded up an A4 page into a booklet and then I sketched out the main points on each panel.
I create a deck of flashcards on some key ideas (question on one side and the answer on the back) and then I test myself with them.
I read the question and before flipping the card, I write out the answer on a sheet of paper or say it out loud. Then I check to see how I went.
The beauty of flashcards is they are small and portable (they can easily fit in your pocket or bag). Whenever you have a spare minute or two, you can get a little active recall practice in.
It’s not enough to do active recall just once on the content you need to learn. For best results, you want to practice recalling the information several times over a period of time.
I didn’t follow a strict schedule for the 30 days. I had my notes for each important chunk of information I had to learn pinned to eight different clipboards.
Every morning, I’d pick up a different clipboard and I’d practice that specific content. I knew as long as I’d had a good night’s sleep in between practice sessions that the information was being strengthened in my brain.
Doing active recall is a bit like doing a high intensity workout: it can be exhausting. But you must remember, just like a high intensity exercise session is an effective way to train and get fit, active recall is an effective way to learn. Unlike less effective strategies (e.g., rereading and highlighting), you can learn a lot in a short space of time with active recall.
The key is to expect the process to be a little uncomfortable. Don’t fight the discomfort. If you trust the process and persevere, it won’t be long before you begin to see amazing results.
Just because active recall is challenging to do that doesn’t mean you can’t have fun with it.
Using a combination of different active recall strategies is one way to keep things fresh and interesting for your brain. But you may wish to try the following things to add a little boost of fun to your active recall sessions:
• Use a different type of pen
• Use a different coloured pen
• Change the type of paper or notebook you use (e.g., instead of using lined paper, use blank A3 paper)
• Incorporate movement into your active recall sessions (e.g., walk and test yourself with some flashcards)
• Change your study environment (e.g., go to the library or study outside)
Like I said, active recall is challenging to do, especially when you first start learning new content. You can feel awkward and clumsy. For this reason, it’s easy to make excuses to get out of doing it (e.g., “I’m too tired”, “I’m not ready to do it”, and “It’s not the right time”).
This is where you need to harness the power of habits.
Find a set time in your day to do a little active recall practice. For instance, during my 30 days of active recall, I scheduled my practice sessions for first thing in the morning. I knew after I washed my face, I would sit down to practice.
Incorporating active recall into my morning routine worked really well for me. I was getting the hardest thing done first thing in the day. And once it was done, I could relax. It was done and dusted!
At a certain point, I became more confident with the content and I found I was on a roll. I felt motivated to do active recall.
This is when I started to look for spare moments in the day to squeeze in a few extra mini practice sessions.
For example, one day I found myself waiting in a car. I grabbed a paper shopping bag and started scribbling out the content onto the bag. As soon as I got home, I checked the shopping bag against my notes.

I hope you can see that there’s no one set way to do active recall. This is a highly effective strategy you can be creative with. As long as you’re testing yourself and checking to see how you went, you can’t go wrong.
And if you do make a mistake? It’s no big deal. If you check to see how you went, you won’t embed the error in your long-term memory.
Dr Jane Genovese delivers interactive sessions on learning to learn, combating procrastination, exam preparation, how to focus in the age of distraction, habit formation and much, much more!
Get FREE study and life strategies by signing up to our newsletter:
© 2024 Learning Fundamentals